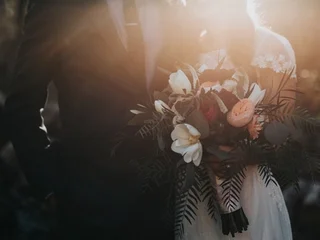
Last month I shot a wedding rehearsal dinner in Tin Hau, mixed lighting nightmare — warm tungsten downlights, a few daylight LEDs some over-enthusiastic planner had rented, plus whatever the heck was bouncing off the goldfish-bowl windows. I came home with 1,400 frames that looked like they came from three different cameras, even though they didn't. The problem wasn't my Lumix GH7. It was me. I'd been tweaking individual photos in Classic mode for two years and pretending I had a workflow.
So I sat down and actually built one. Here's what I landed on — the Lightroom workflow I now use on every shoot to keep my edits looking like they belong to the same photographer. It's not glamorous. It will not win you any Instagram awards by itself. But it will save your ass the day a client asks you to "just brighten that one and match the others."
Start with a real preset library, not "I edit from scratch every time"
I tried that. For about four months. I was lying to myself.
What actually works is a small library of maybe 8 to 12 base looks, each one tuned to a specific shooting scenario. Mine has:
- Indoor Tungsten (warm source, mixed light)
- Outdoor Daylight (clean sun, blue-ish ambient)
- Overcast Soft (low contrast, slightly green cast)
- Indoor Flash (mixed flash + ambient tungsten)
- Black & White Standard (my go-to mono)
- Black & White High Contrast (for drama)
- Sunset Warm (boost the oranges)
- Studio Clean (for product / commercial)
Each preset lives in its own folder under `Lightroom > Presets > Leo`. The naming is intentionally boring — I want to grab one in three seconds without reading a paragraph of moody marketing copy.
The key thing: these are starting points, not finishing points. The mistake I made for years was assuming "applying a preset" was an end state. It's the beginning of state.
The 30-second "global pass" on every import
After import, before I touch a single photo, I do one fast global adjustment on the whole shoot. This is the move that fixed my consistency problem.
- Pick the best-exposed frame in the set (don't pick your favorite — pick the one with the cleanest histogram).
- Copy its Develop settings.
- Paste to all 1,400 frames.
Now everything has the same baseline. Whites are the same white. The shadows don't go to three different blacks depending on which camera I was holding. This takes 30 seconds and saves me hours later when I'm trying to remember why photo 873 looks greenish.
The catch: this only works if your baseline preset is already tuned. Which is the next part.
Tune your baseline preset against a known reference
This is the part nobody tells you. You need to shoot one specific calibration scene and use it as your ground truth.
My reference scene: a friend sitting at a Cafe de Coral table near a window, with the menu card and a coffee cup visible. White wall on one side, wood table on the other, some skin in the middle. I shoot this once a month under the same lighting I shoot in most (window + interior tungsten), import it, and then:
- White Balance: eyeball the wall, set the temp/tint until the wall reads neutral
- Exposure: hold the menu card and make sure I can read all the small print
- Tone Curve: my personal rule — slight S-curve, never extreme
- Color Mixer: desaturate greens a touch, leave blues alone
This becomes the "anchor" for every preset in my library. I tune each preset by shooting the same scene with that preset's intended lighting and adjusting until it matches.
Sounds obsessive. Probably is. But it works.
The "10-minute rule" for hero shots
For the 20 to 40 photos in any set that actually matter — the keepers, the ones that go to the client — I spend up to 10 minutes each. For the other 1,360, the global pass + a single exposure nudge is enough.
The 10 minutes breaks down like this:
- 2 min: spot removal, lens correction, profile corrections
- 3 min: local masks (subject skin, background, specific objects)
- 3 min: color grading (split toning / color mixer)
- 2 min: final sharpening + export preset
The reason I cap it at 10: any more and I start second-guessing the moment instead of trusting it. The photo is the photo. If it needed 25 minutes of editing, I should have shot it differently.
Local adjustments > global ones (most of the time)
I spent years sliding the Highlights and Shadows globally like I was painting with a roller. Then I learned to use masks and now I use the global sliders maybe 5% of the time.
The four masks I actually use:
- Subject mask (AI-generated in Lightroom) — for skin work, eye brightening
- Linear gradient — for skies, walls, anything with a clean horizon
- Radial gradient — for spotlight effects on a face
- Brush — for spot fixes (a logo that's too bright, a distracting reflection)
Everything else gets the global pass from earlier. This keeps the edits looking like they were done by one person with one vision, not a committee.
Calibration, not creativity
The biggest mindset shift: editing is calibration, not creation.
When I edit, I'm not "adding drama" or "creating mood." I'm bringing the photo back to what my eye saw when I took it, then making one or two small tasteful moves. The photo is the photo. The edit is just removing the camera's quirks.
This matters because the moment you start "creating mood" in post, you're now responsible for every photo looking like you want it to look, instead of how it looked. That's an exhausting place to be — and it's why my pre-2026 work looked so inconsistent.
The actual workflow, top to bottom
Here's the whole thing end to end. I keep this list pinned above my monitor.
- Import into dated folder (`2026-06-17_TinHau`)
- Apply global baseline preset (matched to scene lighting)
- Pick best-exposed frame, copy + paste settings to all
- Star-rate keepers (1-3 for client, 5 for personal, 0 for delete)
- Cull aggressively (the best edit is no edit)
- Run global pass on remaining
- For 5-star: 10-minute individual edit
- Export with preset (sRGB, 90% quality, 2048px long edge for web)
- Backup raw files to external SSD same day
I do steps 1-5 in one sitting (usually Saturday morning, coffee, no phone). Steps 6-9 the day before delivery. Trying to do it all in one pass leads to mistakes. Trying to do it all in one day leads to burnout.
What this doesn't fix
I want to be honest about what a Lightroom workflow does NOT solve:
- It won't fix a camera with bad color science (looking at you, early 2010s Sony)
- It won't make a bad photo good
- It won't substitute for shooting in good light in the first place
- It won't work if you don't actually shoot enough to refine your presets over time
The workflow I described is the result of maybe 4,000 hours of editing and 18 months of actively trying to systematize it. Your version will look different. It should — the goal isn't to copy mine, it's to build yours.
Common mistakes I still make
Even with the system above, I screw things up regularly. Here are the patterns I keep catching myself doing:
- Skipping the global pass when I'm in a hurry. I tell myself "I'll just fix the few that look off." I never fix the few. They pile up.
- Over-editing the 5-star shots. The 10-minute cap exists for a reason. Past 10 minutes I'm usually making it worse, not better.
- Not updating my presets after I change cameras. When I switched from the GH6 to the GH7 last year, the color science shifted enough that my presets needed a re-tune. I ignored it for two months and the inconsistency came right back.
- Saving presets named after moods instead of conditions. "Moody Sunset" sounds nice but tells me nothing when I'm in the middle of a shoot. "Outdoor Golden Hour, Warm" tells me exactly when to use it.
- Forgetting to back up raw files same-day. Every time I skip this, I regret it within a week. It's not a Lightroom mistake, but it's part of the workflow and it's the step I keep letting slide.
The system only works if you actually use it. The discipline is the hardest part, not the technical setup.
The one thing I'd tell my past self
If I could go back two years and tell myself one thing about photo editing, it would be this: stop treating each photo like a fresh canvas. Start treating your photo library like a single body of work with a consistent voice. The faster you accept that your edits are part of your artistic identity (just like lens choice and composition), the faster you'll stop producing work that looks like ten different photographers' outtakes stitched together.
The preset library feels like overkill until the day a client asks for "all the photos that match this one look." Then it's the only thing standing between you and three days of pain.
Anyway. That's my workflow. If you want the actual preset files, I might do a separate post on that later — but for now this is enough to get you started. The biggest leap is just committing to having a system, any system, and using it for two months before deciding whether it works.