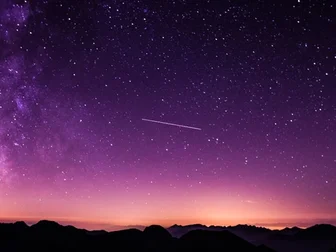
Living in a city doesn't mean you can't shoot stars. I know, I know — you've heard the "drive 3 hours out to the desert" advice a hundred times and thought, cool, but I have a job and a Tuesday deadline. Let me tell you what actually works when your "night sky" is really a beige gradient with maybe three visible stars and the glow of a 7-Eleven across the street.
I shoot most of my astro stuff from my apartment balcony in Hong Kong, or from rooftops in Kowloon. Not ideal. But after a few years of stubborn trial and error, I've pulled off star shots, the Milky Way core, and even a decent aurora hint during that wild May 2024 storm — all from Bortle 8 to 9 skies. You can too. Just lower your expectations a little and raise your processing game a lot.
Forget What You've Read About "Perfect Dark Skies"
Half the astrophotography content online is written by people with cabins in New Mexico. That's not us. We're shooting from balconies, parking lots, and that one quiet corner of the park where the streetlight is at least blocked by a tree. The trick isn't finding dark skies — it's working with the sky you've got.
Light pollution doesn't ruin astrophotography. It just changes what you can capture and how you process it. The Milky Way is still there, hiding behind the orange glow. You just have to know how to dig it out.
The Gear That Actually Matters
You don't need a fancy astro tracker. I shoot most of my city sky stuff hand-held... okay, not really. But I shoot with a regular tripod, no star tracker, no equatorial mount, no $2000 telescope. Just my main camera (Panasonic Lumix GH7), a fast wide lens, and a sturdy tripod.
The non-negotiables:
A camera that handles high ISO well. My GH7 is fine up to ISO 6400 for stars. Above that and the noise eats the detail. Full-frame is obviously better here, but micro four-thirds works if you manage expectations.
A fast wide lens. My OM SYSTEM 12-40mm f/2.8 PRO II is my workhorse. Wide open at f/2.8, focused manually to infinity (or just past, on MFT). For full-frame shooters, anything from 14mm to 24mm f/2.8 or faster. The Samyang 14mm f/2.8 is a budget classic for a reason.
A stable tripod. Doesn't have to be carbon fiber. Mine is a battered Manfrotto that survived being kicked over at a beach shoot last summer. Just heavy enough not to wobble in a light breeze.
A remote shutter or 2-second timer. Touching the camera during a long exposure is the fastest way to ruin a 20-second shot.
Nice-to-haves: a lens hood to fight stray light, a headlamp with a red filter mode, and a small piece of black cloth to drape over the camera if a car headlight sweeps past.
Camera Settings for City Skies
Here's where everything you've read online gets thrown out the window. The "rule of 500" for star points (500 divided by focal length equals max shutter speed) assumes dark skies. In a city, you have more leeway because the sky is already bright. But you also have less to capture, so longer exposures don't help as much as you'd think.
My go-to settings for a single star field from a city balcony:
Aperture: Wide open. f/2.8 if you have it, f/4 if that's your fastest. Stop down only if you're trying for sunstars on streetlights (sometimes a fun compositional element).
ISO: 1600 to 6400. I start at 3200 on the GH7, check the histogram, push up if the sky is too dim.
Shutter speed: 10 to 20 seconds. With a 12mm lens on MFT (24mm full-frame equivalent), I can get away with 15 seconds before stars start trailing. Wider focal length means more time.
Focus: Manual, live view, magnified, point at the brightest star you can find, rack focus until the star is the smallest possible dot. Tape the focus ring with gaff tape so it doesn't drift.
White balance: Tungsten or incandescent (around 3200K) to fight the orange sodium-vapor light pollution. You'll fix the rest in post.
Format: RAW. Always RAW. JPEG is for daylight snapshots, not stars in a city.
For the Milky Way specifically, I push the ISO to 6400 and the shutter to 20 seconds. Then I take 20 to 30 shots of the same composition and stack them later. Stacking is the single biggest cheat code for city astrophotography — more on that in a sec.
Composition: The City Is the Subject, Not the Enemy
Here's where my brain shifted a few years ago. I stopped trying to pretend the city wasn't there. The buildings, the harbor, the bridges, the skyline — those are part of the photo. Astrophotography from a city isn't about removing the urban context. It's about balancing it.
A few compositional tricks I lean on:
Silhouette the skyline. Let the stars live above a recognizable city shape. Hong Kong's harbor with the Milky Way above it is more interesting than a generic star field.
Use the light pollution gradient. The orange glow from a distant district can act as a natural color gradient in your sky, way better than a flat black sky.
Find architectural frames. Archways, building corners, bridges — anything that frames the sky and adds depth.
Shoot during astronomical twilight or moonrise. The sky doesn't have to be pitch black. A hint of blue or a low moon can light your foreground beautifully.
Last summer I shot from a friend's rooftop in Wan Chai, facing south. The Milky Way core was rising behind ICC tower. I framed it so the tower was a dark silhouette on the lower right and the galactic core stretched across the upper left. Single image, no stacking, taken at 20s f/2.8 ISO 6400. That shot ended up in a gallery show. Could I have gotten it cleaner from a desert? Sure. But the city made it specific. It was that shot, that place, that night.
Stacking: The Real Secret Weapon
If you take one piece of advice from this article, take this one: stack your exposures. A single 20-second shot from a city will be noisy, dim, and grainy. Stack 20 of them and the noise averages out. The faint stuff that was hidden under noise becomes visible. The stars stay sharp.
I use Sequator (free, Windows) or DeepSkyStacker for star-aligned stacks. For Milky Way specifically, the modern workflow is:
1. Shoot 20 to 30 frames at the same settings, same composition.
2. Shoot 10 "dark frames" — same exposure, lens cap on, same ISO.
3. Run them through a stacker with star-alignment mode.
4. Pull the result into Lightroom or Photoshop for final color grading.
The difference between a single frame and a stacked frame from the same city sky is night and day. Literally. Single frame: orange mush with three stars. Stacked frame: visible Milky Way structure, hundreds of stars, gradient sky that looks intentional.
I used to think stacking was for deep-sky galaxy imaging. Nope. For city Milky Way work, it's basically required.
Dealing with the Light Pollution in Post
Even with stacking, the city glow will dominate your image. You have to actively pull it out. My Lightroom recipe:
1. Drop the white balance temp to around 3200K or lower to neutralize the orange.
2. Reduce the orange and yellow saturation in the HSL panel — specifically the orange hue, full saturation cut.
3. Lift the shadows and blacks aggressively to bring out the faint Milky Way structure.
4. Add contrast and clarity to the sky mask only, leaving the foreground alone.
5. Use the dehaze slider carefully — too much and the stars get crunchy.
Photoshop gives you more control with selective color and curves, but for 80 percent of city astro shots, Lightroom is enough.
The Realistic Expectations Talk
Here's the part where I kill some dreams gently. From a true Bortle 8 or 9 city center, you will not get a publication-quality Milky Way panorama. The sky is too bright. The contrast is too crushed. You'll get a nice star field, a hint of Milky Way structure, and a beautiful urban composition. That's a real photo. That's worth shooting.
If you want the full cosmic grandeur, you do need to drive out. But you don't need to drive to the desert. A 30 to 60 minute drive to the suburbs usually gets you Bortle 5 or 6, which is enough for stunning Milky Way shots. I do this maybe once a month when the core is well-positioned. The rest of the time, I shoot from the city and enjoy the constraint.
A Few Last Tips From the Field
Check the moon phase. A full moon is the enemy of city astrophotography. New moon or thin crescent is your friend. Apps like PhotoPills or Stellarium tell you exactly when the core is up and where.
Shoot in RAW, always. I know I said it. Saying it again.
Warm up. Long exposures on a cold rooftop will kill your battery. Bring a spare, keep it in an inner pocket.
Tell someone where you are. Rooftops and dark parks can be sketchy alone at 2am. Bring a friend if you can.
Be patient with focus. Manual focus on stars is harder than it sounds. Take your time, use live view magnified to 100 percent, find the brightest star, tweak until it's a pinpoint.
That's it. No exotic gear required. No desert pilgrimage. Just your regular camera, a tripod, a bit of stacking knowledge, and the willingness to find beauty in the sky you've actually got. The stars are still up there. The city just makes you work a little harder to see them.
Now go shoot something.